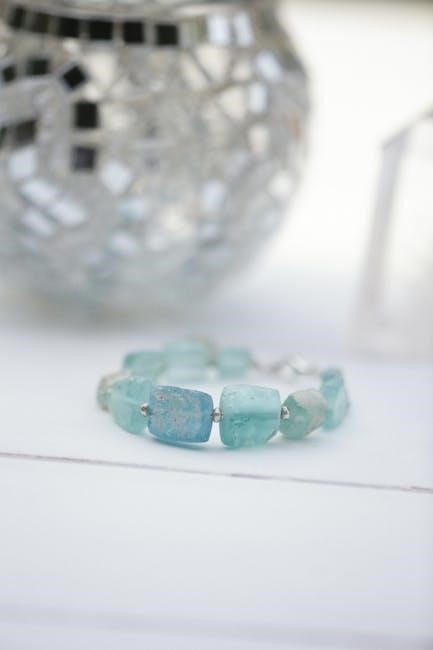
Tila beads, originating from Miyuki, are flat, tile-like beads with two holes, offering unique bracelet-making possibilities․
These versatile beads are perfect for crafting stylish accessories!
What are Tila Beads?
Tila beads are distinctive, small, flat beads resembling tiny tiles, celebrated for their two-hole construction․ These unique beads, often referred to as Miyuki beads, unlock a world of creative possibilities in jewelry making, particularly for bracelets․
Their shape allows for fascinating patterns and designs not easily achievable with traditional round beads․ Available in a spectrum of colors and finishes, Tila beads offer designers immense flexibility․ They come in full squares and various sizes, enabling intricate and personalized bracelet creations․ The dual holes facilitate diverse threading techniques, making them a favorite among beaders seeking innovative designs․
History and Origin of Tila Beads (Miyuki)
Tila beads trace their origin to Miyuki, a renowned Japanese manufacturer celebrated for precision and quality in seed bead production․ Established with a commitment to innovation, Miyuki revolutionized the beading world with consistently sized, beautifully finished beads․
The Tila bead, a relatively recent addition to Miyuki’s extensive catalog, quickly gained popularity due to its unique shape and design potential․ Miyuki’s dedication to color consistency and precise manufacturing ensures that Tila beads are highly sought after by jewelry artists globally․ Their commitment to quality has cemented Miyuki’s position as a leader in the bead industry․
Why Choose Tila Beads for Bracelet Making?
Tila beads offer unparalleled versatility for bracelet creation, thanks to their distinctive flat, square shape and dual-hole design․ This unique form allows for intricate patterns and seamless connections, creating visually stunning bracelets․ Their consistent size ensures uniform results, simplifying the beading process and minimizing frustration․
Beyond aesthetics, Tila beads are durable and comfortable to wear․ They readily incorporate with other bead types, like seed beads and charms, expanding design possibilities․ Whether you’re a beginner or an experienced beader, Tila beads provide a rewarding and creative outlet for jewelry making!

Materials Needed for a Tila Bead Bracelet
To begin crafting, gather Tila beads, elastic cord, a beading needle, and tools like clasps or stoppers․ Nail polish or glue is also useful!
Types of Tila Beads (Sizes & Finishes)
Tila beads come in a delightful array of sizes and finishes, impacting bracelet design․ The most common is the 2-hole Tila bead, available in various lengths – 6mm, 9mm, 11mm, and 15mm – influencing the overall scale of your bracelet․
Beyond size, finishes are diverse! You’ll find classic opaque colors, shimmering metallic options, and transparent finishes allowing light to play through․ Some Tila beads boast AB finishes (Aurora Borealis), creating a rainbow-like effect․
Square Tila beads are the standard, but half Tila beads exist for more complex patterns․ Considering these variations unlocks creative potential, allowing for unique textures and visual interest in your Tila bead bracelet creations․
Elastic Cord Options
Choosing the right elastic cord is crucial for a durable and comfortable Tila bead bracelet․ Several options exist, differing in stretch, thickness, and strength․ Standard clear elastic is versatile and affordable, suitable for lighter bracelets․ However, for heavier designs or frequent wear, consider a thicker, more robust cord․
Stretch Magic is a popular brand known for its excellent elasticity and knot-holding ability․ Pre-stretched elastic minimizes stretching after completion․ Cord diameter impacts bead hole size; ensure a snug fit without excessive strain․
Experimenting with different cords allows you to tailor the bracelet’s feel and longevity to your specific design and intended use․
Beading Needles and Tools
Creating Tila bead bracelets requires specific tools for efficiency and precision․ Beading needles, particularly those with a large eye to accommodate elastic cord, are essential․ Needle sizes vary; choose one appropriate for your bead hole size․ A bead stopper prevents beads from sliding off the cord during threading․
Small scissors or a thread cutter are needed for trimming the elastic cord․ A bead board can help with layout and design planning․ Consider using tweezers for precise bead placement, especially with smaller Tila beads․
Applying a tiny drop of clear nail polish or beading glue to the knot secures it, preventing unraveling and ensuring bracelet durability․
Other Useful Supplies (Clasps, Stoppers)
While many Tila bead bracelets utilize the elasticity of the cord for a slip-on design, clasps offer a secure and adjustable fit․ Toggle clasps, lobster clasps, or magnetic clasps are popular choices․ Crimp beads and crimp covers provide a professional finish when attaching clasps to the elastic cord․
Bead stoppers are invaluable for preventing beads from sliding off the cord while working, especially during intricate patterns․ Consider using temporary bead stoppers during design and permanent ones when finishing the bracelet․
Clear nail polish or beading glue reinforces the knot, preventing slippage and extending the bracelet’s lifespan;
Basic Tila Bead Bracelet Techniques
Threading Tila beads involves using a beading needle and elastic cord․ Mastering secure knotting techniques is crucial, and reinforcing knots with glue ensures durability․
Threading Tila Beads
Threading Tila beads is the foundational step in creating your bracelet․ Begin by selecting a beading needle with an eye large enough to accommodate your elastic cord․ Carefully thread the elastic through the needle’s eye, ensuring a secure hold․
Due to the two-hole design of Tila beads, you have options for threading direction, influencing the bracelet’s pattern․ Generally, threading consistently – either through the top and bottom holes, or alternating – creates a neat appearance․
Maintain a gentle tension on the elastic as you add beads, preventing excessive slack or tightness․ Avoid overfilling the needle, as this can cause tangling and frustration․ Practice makes perfect, so don’t be discouraged if it takes a few tries to get comfortable with the process!
Knotting Techniques for Elastic Cord
Securing your Tila bead bracelet requires a strong, reliable knot․ A surgeon’s knot is highly recommended for elastic cord, as it provides extra security and resists slippage․ Begin by tying a standard overhand knot, then pass the cord through the loop a second time before tightening․
Ensure the knot is snug against the beads, minimizing any gaps․ Pull the knot firmly, but avoid excessive force that could damage the elastic․ Multiple knots can be tied for added reinforcement, especially with heavier bead designs․
Remember to leave a small tail of elastic after knotting for later securing with glue or nail polish, enhancing the knot’s longevity and preventing unraveling․
Securing Knots (Nail Polish/Glue)
After knotting your elastic cord, reinforcing the knot is crucial for a durable Tila bead bracelet․ A tiny drop of clear nail polish or jewelry glue directly onto the knot will prevent it from loosening over time․ Apply sparingly, using a toothpick for precision․
Allow the nail polish or glue to dry completely before wearing the bracelet – typically 15-30 minutes․ This prevents stickiness and ensures a strong bond․ Avoid using thick or colored nail polish, as it may be visible and detract from the bracelet’s aesthetic․
This simple step significantly extends the lifespan of your creation, safeguarding against bead loss and ensuring lasting enjoyment․

Step-by-Step Tila Bead Bracelet Tutorial (Simple Design)
Begin by cutting elastic cord, tying a secure knot, and then adding Tila beads to create a repeating pattern for a beautiful, simple bracelet!
Preparing the Elastic Cord
Selecting the right elastic cord is crucial for a durable and comfortable Tila bead bracelet․ Cut two pieces of elastic cord, approximately 15 inches long – this provides ample length for knotting and bead threading․
Carefully tie a secure knot at one end, joining both cord pieces together․ This creates a strong foundation for your design․
For added security, apply a small drop of clear nail polish or jewelry glue directly onto the knot․ Allow it to dry completely before proceeding․ This prevents the knot from unraveling during the beading process and ensures a long-lasting bracelet․
Ensure the knot is snug but not overly tight, allowing for some flexibility within the bracelet’s structure․
Adding the First Tila Beads
Begin threading the Tila beads onto both strands of the prepared elastic cord simultaneously․ This ensures a balanced and symmetrical bracelet design․
Start with your chosen color scheme, carefully sliding the beads onto the cord․ Consider the orientation of the beads – how they face will impact the overall pattern․
Maintain consistent tension as you add beads, preventing them from being too loose or too tightly packed․
Continue adding beads until you reach your desired bracelet length, periodically checking the fit around your wrist․ Remember to leave enough cord length for knotting and securing the bracelet at the end․
Creating a Repeating Pattern
Establish a consistent sequence of Tila bead colors and orientations to form a visually appealing pattern․ This could be a simple alternating color scheme or a more complex arrangement․
Repeat this sequence throughout the length of the bracelet, ensuring uniformity and balance․ Regularly check your work to maintain the pattern’s integrity․
Experiment with different combinations to discover unique designs․ Consider incorporating variations within the repeating pattern to add visual interest․
Visualize the finished bracelet as you build the pattern, adjusting as needed to achieve your desired aesthetic․ A well-defined pattern elevates the bracelet’s overall look․
Finishing and Securing the Bracelet
Once the desired length is achieved, carefully tie a secure knot in the elastic cord, ensuring all Tila beads are snug․ Double or triple knotting is recommended for added strength․
Apply a small drop of clear nail polish or jewelry glue directly onto the knot․ This prevents unraveling and provides long-lasting security․ Allow the glue to dry completely before handling․
Trim any excess elastic cord close to the knot, being careful not to cut the knot itself․ A clean finish enhances the bracelet’s appearance and prevents snagging․
Gently stretch the bracelet to test the knot’s integrity․ A secure knot ensures the bracelet remains intact during wear and maintains its shape․
Advanced Tila Bead Bracelet Patterns
Explore intricate designs like Chevron, Brick Stitch, and Peyote Stitch for stunning bracelets․ These patterns elevate your Tila bead creations with complex textures!
Chevron Pattern
The Chevron pattern, a classic in beadwork, creates a distinctive V-shaped design․ This pattern utilizes Tila beads to form symmetrical, eye-catching bracelets․ Begin by understanding the repeating unit of the chevron – typically involving a specific arrangement of beads that is mirrored on either side․
Careful threading is crucial; maintain consistent tension to ensure the chevron points are sharp and defined․ Many tutorials demonstrate how to build the chevron row by row, gradually expanding the pattern outwards․ Experiment with color combinations to highlight the V-shapes and add visual interest․ This pattern is moderately challenging, requiring patience and attention to detail, but the result is a beautifully textured and sophisticated bracelet․
Brick Stitch Pattern
The Brick Stitch is a popular technique for creating intricate designs with Tila beads, resembling a brick wall․ This method involves perpendicularly adding beads to a foundation thread, creating a solid and durable bracelet structure․ Begin with a base row of Tila beads and then “brick” subsequent rows onto it, one bead at a time․
Maintaining consistent tension is vital for a neat and even brick stitch․ Many patterns utilize color changes within the brickwork to form geometric shapes or pictorial designs․ While initially appearing complex, the brick stitch becomes intuitive with practice․ It’s a fantastic technique for creating robust bracelets with a unique, textured appearance, offering endless design possibilities․
Peyote stitch, a classic off-loom beading technique, creates a dense, fabric-like structure ideal for Tila bead bracelets․ It’s named after the Native American peyote cactus, reflecting the pattern’s repetitive, circular nature․ This stitch involves passing the needle through two beads at a time, creating a staggered, overlapping effect․
Even or Odd Count Peyote are the two main variations․ Even count creates a flatter, more flexible bracelet, while odd count results in a slightly raised, more sculptural design․ Mastering peyote stitch unlocks a world of intricate patterns and designs, allowing for complex colorwork and detailed motifs․ It requires patience, but the results are stunning!
Design Ideas and Inspiration
Tila bead bracelets offer endless creative possibilities! Explore vibrant color combinations, incorporate seed beads or charms, and craft seasonal designs for unique, personalized jewelry․
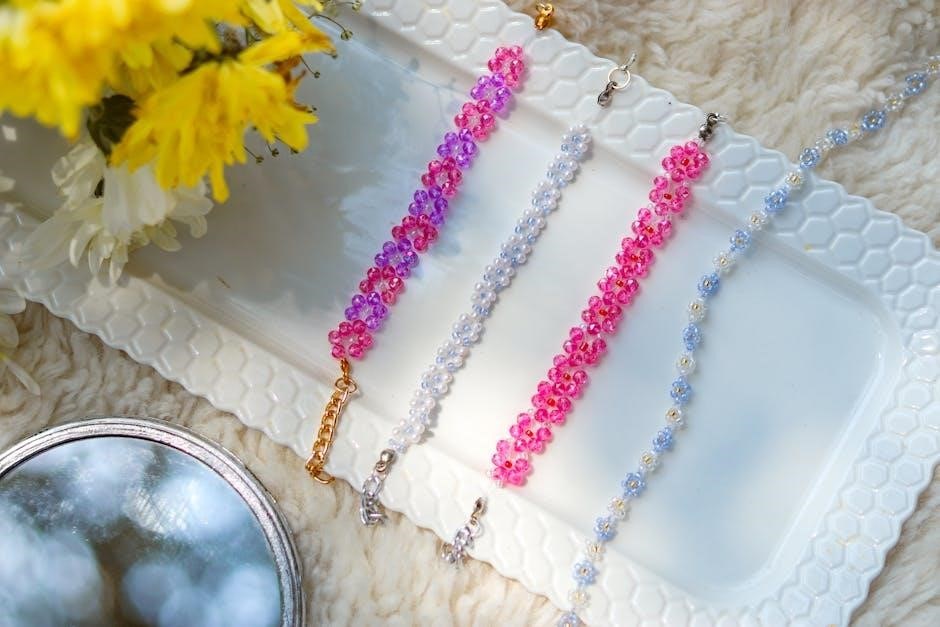
Color Combinations for Tila Bead Bracelets
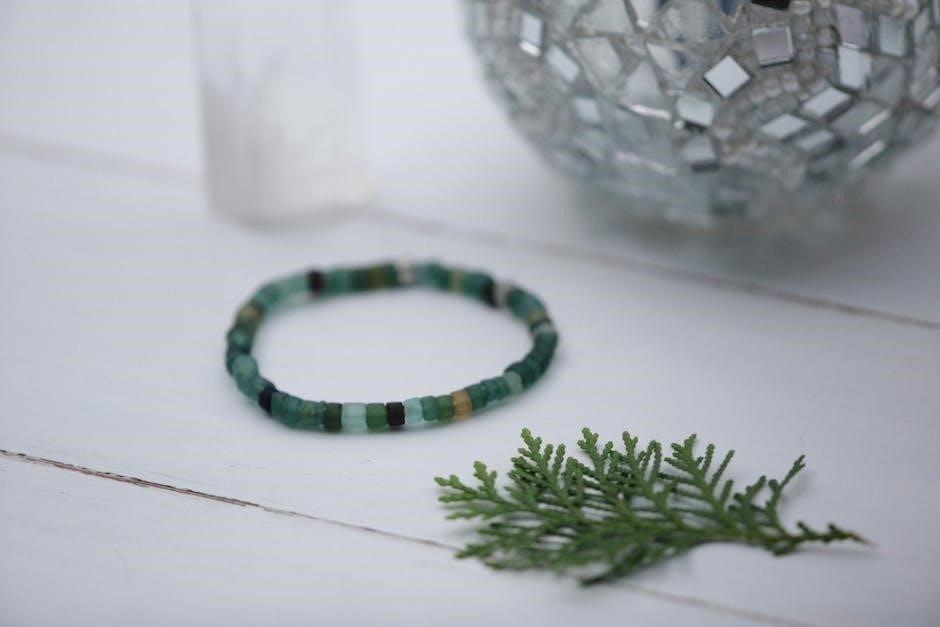
Tila beads truly shine when thoughtfully paired in captivating color combinations․ Consider monochromatic schemes using varying shades of a single hue for a sophisticated look․
Complementary colors, like blue and orange, or purple and yellow, create bold, eye-catching designs․
Analogous color schemes – using colors adjacent on the color wheel, such as blues, greens, and purples – offer harmonious blends․
Don’t be afraid to experiment with neutral tones like silver, gold, or black to accentuate brighter tila bead colors․
Seasonal palettes, mirroring autumn’s warm tones or spring’s pastels, can also inspire beautiful bracelet creations;
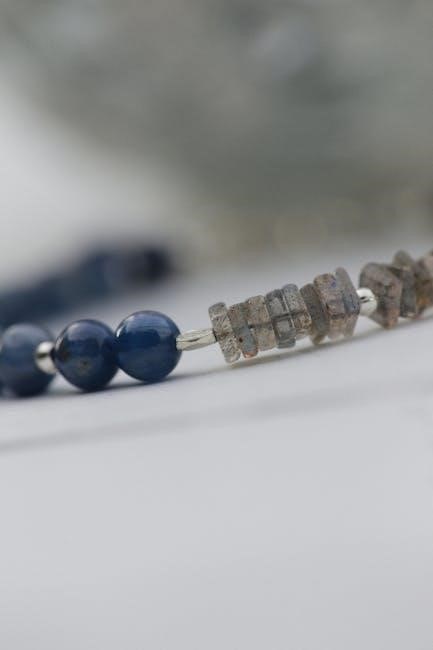
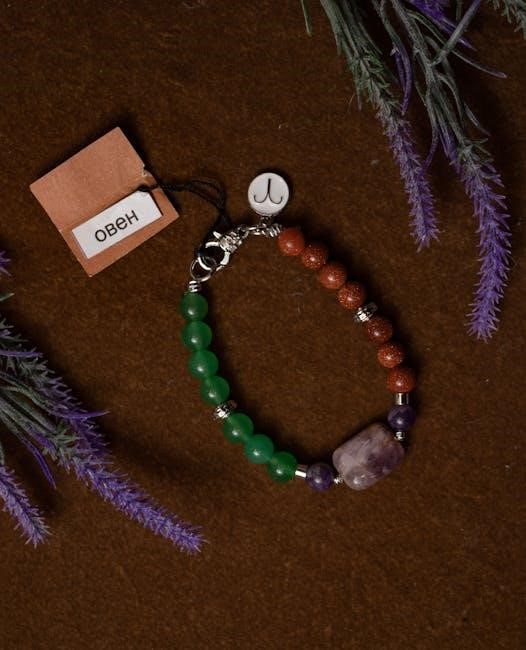
Incorporating Other Beads (Seed Beads, Charms)
Tila bead bracelets gain dimension and personality by integrating other bead types․ Seed beads, smaller than tila beads, can fill gaps or create intricate patterns around the tila tiles․
Use seed beads to outline tila shapes or add delicate borders․
Charms, pendants, or focal beads introduce thematic elements and personalized touches․
Consider the scale – larger charms balance well with multiple tila beads, while smaller charms suit more minimalist designs․
Experiment with different textures and finishes to enhance visual interest․
Ensure added beads complement, rather than overwhelm, the tila bead aesthetic․
Seasonal and Holiday-Themed Bracelets
Tila bead bracelets are ideal for crafting festive, seasonal accessories!
For autumn, utilize warm color palettes – oranges, browns, and reds – mimicking falling leaves․
Winter designs can incorporate silver, white, and icy blue tila beads, evoking snowflakes․
Springtime calls for pastel shades and floral charms․
Holiday-themed bracelets shine with red and green for Christmas, or orange and black for Halloween․
Consider adding themed charms like snowflakes, hearts, or pumpkins․
These bracelets make thoughtful, handmade gifts, perfectly capturing the spirit of each season!
Troubleshooting Common Issues
Tila bead bracelet problems? Tangled cord, broken strands, or bead slippage are easily fixed with careful knotting, glue, and patience!
Dealing with Tangled Elastic Cord
Elastic cord tangling is a common frustration when working with Tila bead bracelets․ Prevention is key – avoid pulling the cord excessively during threading․ If tangles occur, gently try to loosen them with your fingers, avoiding harsh yanking which can weaken the elastic․
Lay the cord flat on a clean surface and patiently separate the strands․ A bead needle can help navigate tight knots․ If the tangle is severe, consider carefully cutting the cord and re-threading, adding a few extra inches to compensate for the loss․ Remember to secure the ends with a strong knot and a touch of clear nail polish or glue to prevent further unraveling and ensure bracelet durability․
Fixing Broken Bracelets
A broken Tila bead bracelet doesn’t mean the end! First, carefully assess the damage – is it a broken cord or lost beads? If the cord snapped, gently remove the remaining beads․ Re-thread the beads onto a new length of elastic, ensuring a secure knot․ For missing beads, try to match the color and finish as closely as possible․
If exact matches aren’t available, consider a slightly different shade for a unique touch․ Re-tie the knot, reinforcing it with nail polish or glue; Regularly checking the knot’s security can prevent future breaks, extending the life of your beautiful Tila bead creation․
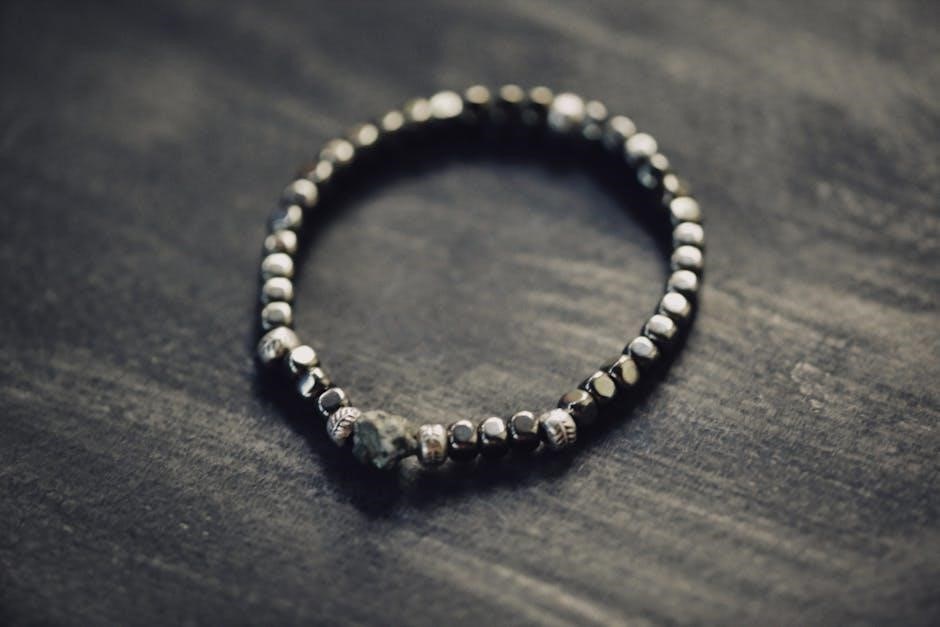
Preventing Bead Slippage
Bead slippage is a common concern with elastic bracelets․ To minimize this, use a high-quality elastic cord specifically designed for jewelry making․ When knotting, ensure a very tight and secure knot – multiple knots can provide extra hold․ Applying a tiny drop of clear nail polish or jewelry glue directly to the knot is crucial; this hardens and prevents unraveling․
Avoid overstretching the elastic during bracelet creation․ Regularly inspect your Tila bead bracelet for any signs of loosening, and re-secure the knot if needed․ Proper knotting and reinforcement are key to enjoying your handmade jewelry for a long time!
Caring for Your Tila Bead Bracelet
Tila bead bracelets require gentle cleaning with a soft cloth․ Store them separately to avoid scratches and prolong their vibrant appearance and lifespan․
Cleaning and Storage
Maintaining your Tila bead bracelet’s beauty is surprisingly simple! Regularly wipe the beads with a soft, slightly damp cloth to remove any dirt or oils that may accumulate․ Avoid harsh chemicals or abrasive cleaners, as these can damage the finish of the beads or the elastic cord․
For storage, it’s best to keep your Tila bead bracelets in a soft pouch or jewelry box, separated from other pieces to prevent scratching․ Avoid exposing them to direct sunlight or extreme temperatures for extended periods․ Proper storage will help preserve the color and integrity of your beautiful creations, ensuring they remain a cherished part of your jewelry collection for years to come!
Extending Bracelet Lifespan
To maximize the life of your Tila bead bracelet, mindful wear is key․ Avoid exposing the bracelet to excessive stretching or pulling, as this can weaken the elastic cord over time․ Remove the bracelet before engaging in activities that could cause it to snag or be damaged, such as sports or strenuous work․
Periodically check the knots securing the bracelet and re-tie or reinforce them if necessary․ Applying a tiny drop of clear nail polish or jewelry glue to the knot can provide extra security․ Proper care and attention will ensure your Tila bead bracelet remains a beautiful and durable accessory for a long time!
Resources for Tila Bead Bracelet Makers
Explore online stores like BunnyStoryShop for Tila beads and supplies; Join beading communities and forums for tutorials and inspiration, enhancing your crafting journey!
Online Stores for Tila Beads and Supplies
Finding a reliable source for Tila beads is crucial for successful bracelet making․ Several online retailers specialize in Miyuki beads, offering a wide variety of colors, sizes, and finishes․ BunnyStoryShop, based in Spain, is one example, providing bead loom jewelry, patterns, and materials․
Beyond specialized shops, larger craft supply stores like Etsy and Amazon also carry Tila beads․ When selecting a vendor, consider shipping costs, return policies, and customer reviews․ Ensure the beads are genuine Miyuki Tila beads to guarantee quality and consistency in your projects․ Don’t forget to check for elastic cord, beading needles, and other essential supplies at these retailers!
Beading Communities and Forums
Connecting with fellow Tila bead enthusiasts can greatly enhance your bracelet-making journey․ Online beading communities and forums provide a platform to share designs, ask questions, and learn new techniques․ These spaces are invaluable for troubleshooting issues like tangled elastic or bead slippage․
Many forums host tutorials and pattern exchanges, offering inspiration for advanced designs like chevron or peyote stitch․ Participating in these communities allows you to gain feedback on your work and discover innovative ways to utilize Tila beads․ Search online for dedicated beadwork groups to find a supportive network of crafters!
Tutorial Websites and Videos
Numerous online resources offer step-by-step Tila bead bracelet tutorials, catering to all skill levels․ Video platforms are particularly helpful for visualizing techniques like threading beads, knotting elastic cord, and creating repeating patterns․ These visual guides simplify complex steps, making bracelet making accessible to beginners․
Websites dedicated to beading often provide detailed instructions and free patterns, including designs for chevron, brick stitch, and peyote stitch bracelets․ Explore these resources to learn how to incorporate other beads and charms, and discover seasonal design ideas․ Don’t hesitate to utilize these tools!